Is your lead calcium battery damaged and in need of restoration? Restoring a damaged lead calcium battery may seem like a challenging task, but fear not! In this article, we will delve into the process of reviving your battery, giving it a new lease on life. Don’t worry, you don’t need to be an expert to accomplish this, as we will guide you through the steps in a simple and straightforward manner. By the end of this article, you’ll have the knowledge and confidence to restore a damaged lead calcium battery effectively. So let’s dive in and get started!

Restoring A Damaged Lead Calcium Battery
Introduction
Welcome to our comprehensive guide on restoring a damaged lead calcium battery. If you’ve encountered a lead calcium battery in need of repair, this article will provide you with valuable insights and step-by-step instructions to bring it back to life. A lead calcium battery is commonly used in various applications, including automobiles, solar power systems, and UPS backup systems.
Restoring a damaged lead calcium battery can save you money and extend the battery’s lifespan. It is an eco-friendly approach that minimizes waste by rejuvenating the battery rather than replacing it. In the following sections, we will explore the reasons why lead calcium batteries get damaged, the signs of a damaged battery, and the steps involved in restoring it.
Understanding Lead Calcium Batteries
Before diving into restoration techniques, it’s essential to have a basic understanding of lead calcium batteries. Unlike traditional lead-acid batteries, which use antimony or selenium alloys, lead calcium batteries utilize a calcium alloy on the negative plates. This design makes them more resistant to self-discharge and water loss.
Lead calcium batteries are known for their high energy density, making them ideal for applications where dependable power is required. However, like any other battery, they are susceptible to damage over time due to various factors. By understanding these factors, you can take preventative measures to avoid damage and optimize battery performance.
Factors Contributing to Lead Calcium Battery Damage
1. Overcharging: Charging a lead calcium battery beyond its recommended voltage can cause excessive gassing and accelerate plate corrosion, leading to damage.
2. Undercharging: Regularly discharging a battery below its recommended depth of discharge can result in sulfation, reducing its capacity and overall performance.
3. Self-discharge: Lead calcium batteries have a higher self-discharge rate compared to other battery types. If left unused for extended periods, they may discharge to a point where irreversible damage occurs.
4. Temperature extremes: Exposure to extreme temperatures, both hot and cold, can affect the performance and longevity of lead calcium batteries.
Signs of a Damaged Lead Calcium Battery
To determine if your lead calcium battery is damaged and in need of restoration, look out for the following signs:
1. Reduced capacity: The battery’s ability to hold a charge diminishes over time, resulting in shorter run times between charges.
2. Slow charging: If the battery takes significantly longer to reach a full charge, it may indicate damage to the internal plates.
3. Low voltage: A damaged battery may exhibit consistently low voltage readings, even after a full charge.
4. Swollen or bulging case: Physical deformation of the battery case can indicate internal damage caused by excessive heat or overcharging.
Steps to Restore a Damaged Lead Calcium Battery
Now that we understand the factors contributing to lead calcium battery damage and the signs of a damaged battery, let’s explore the steps involved in restoring it:
Step 1: Safety Precautions
Before handling a damaged lead calcium battery, it’s important to take the following safety precautions:
- Wear protective gloves and safety glasses to prevent acid contact with your skin or eyes.
- Work in a well-ventilated area to minimize exposure to battery fumes.
- Keep open flames and sparks away from the battery to avoid potential explosions.
Step 2: Battery Inspection
Begin the restoration process by thoroughly inspecting the damaged lead calcium battery:
- Check for any visible signs of damage, such as leaks, corrosion, or bulging.
- Measure the voltage using a multimeter to determine the state of charge. A fully charged battery should have a voltage reading close to its rated voltage.
- Record the battery’s specific gravity using a hydrometer to assess the condition of the electrolyte. Low specific gravity may indicate sulfation or other internal damage.
Step 3: Battery Cleaning
Proper cleaning of the damaged lead calcium battery is crucial for optimal restoration:
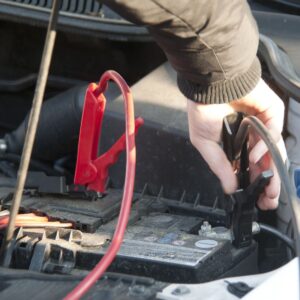
- Disconnect the battery from any power source and remove it from the device or vehicle.
- Use a mixture of baking soda and water to neutralize any acid spills or corrosion on the battery terminals or cables.
- Gently scrub the terminals and cables using a wire brush to remove any built-up corrosion.
- Rinse the battery with clean water and dry it thoroughly before proceeding to the next step.
Step 4: Desulfation
Sulfation is a common issue in lead calcium batteries that can be addressed through the desulfation process. Several methods can help desulfate the battery:
- Using a desulfator device: Connect a desulfator device, specifically designed for lead calcium batteries, to initiate the desulfation process. Follow the manufacturer’s instructions for optimal results.
- Applying an equalizing charge: Connect the battery to a suitable charger and apply an equalizing charge to break down sulfate crystals on the plates. Consult the battery manufacturer’s guidelines for the recommended voltage and duration of the equalizing charge.
- Utilizing chemical additives: Certain chemical additives, available in the market, claim to remove sulfation from lead calcium batteries. Follow the instructions provided by the manufacturer for proper application.
Step 5: Recharging
Once the desulfation process is complete, it’s time to recharge the lead calcium battery:
- Connect the battery to a suitable charger that matches its voltage and current rating.
- Follow the manufacturer’s instructions for the recommended charging voltage and duration.
- Monitor the battery during the charging process and ensure it does not overheat. If the battery becomes excessively hot, stop the charging process immediately.
- Once fully charged, disconnect the battery and perform a voltage test to ensure it reaches the expected voltage level.
Restoring a damaged lead calcium battery is a cost-effective and environmentally friendly approach that can extend its lifespan and save you money. By understanding the factors contributing to battery damage, recognizing the signs of a damaged battery, and following the step-by-step restoration process outlined in this guide, you can bring your lead calcium battery back to life.
Remember to prioritize safety throughout the restoration process by wearing protective gear and working in a well-ventilated area. Regular maintenance and proper charging practices will help prevent future damage and ensure optimal battery performance.
If you have any specific questions or concerns about restoring your lead calcium battery, consult the battery manufacturer’s guidelines or seek professional assistance.
Frequently Asked Questions
Can a damaged lead calcium battery be restored?
Yes, it is possible to restore a damaged lead calcium battery under certain conditions.
What are the signs of a damaged lead calcium battery?
Signs of a damaged lead calcium battery include reduced capacity, slower charging, and frequent discharging.
How can I restore a damaged lead calcium battery?
You can attempt to restore a damaged lead calcium battery by desulfating it using a desulfator or by performing a deep discharge and recharge cycle.
What is a desulfator and how does it work?
A desulfator is a device that helps remove sulfation from lead calcium batteries. It sends high-frequency pulses to break down and remove the lead sulfate crystals that accumulate on the battery plates, improving overall battery performance.
Is it guaranteed that restoring a damaged lead calcium battery will be successful?
There is no guarantee that restoring a damaged lead calcium battery will be successful as it depends on the extent of the damage and the battery’s overall condition. It is worth attempting restoration methods before considering replacement.
Final Thoughts
Restoring a damaged lead calcium battery is a straightforward process that can extend its lifespan and save you money. By identifying the cause of the damage, such as overcharging or sulfation, and taking appropriate measures, you can effectively rejuvenate the battery. Firstly, ensuring the battery is fully charged and removing any surface corrosion is crucial. Next, utilizing desulfation techniques, such as applying a high voltage pulse or using a desulfator, can help break down sulfation build-up. Lastly, maintaining the battery with regular maintenance and monitoring its performance will ensure its long-term health. Restoring a damaged lead calcium battery is an economical and efficient way to prolong its functionality.