Looking to learn how to use the Yocan battery? Well, look no further! In this article, we will guide you through the entire process, providing you with a simple and straightforward solution. Whether you’re a beginner or a seasoned user, we’ve got you covered. With our step-by-step instructions and helpful tips, you’ll be mastering the Yocan battery in no time. So, if you’re ready to delve into the world of vaping and enjoy a seamless experience, let’s get started on your journey of using the Yocan battery.
How to Use Yocan Battery: A Comprehensive Guide
Introduction
Welcome to our comprehensive guide on how to use Yocan battery. Whether you are new to vaping or a seasoned vaper, understanding how to properly use your Yocan battery is essential for a seamless and enjoyable experience. In this guide, we will walk you through the various aspects of using a Yocan battery, including assembly, charging, adjusting settings, and troubleshooting common issues. Let’s dive in and get started!
Section 1: Assembly
Assembling your Yocan battery is the first step to using it. Here’s a step-by-step guide on how to properly assemble your Yocan battery:
1. Start by ensuring that your Yocan battery is fully charged. If it’s not, connect the provided USB charger to the battery’s charging port and plug it into a power source.
2. Once your battery is fully charged, detach the mouthpiece or atomizer from the battery.
3. Take your favorite Yocan cartridge or atomizer and screw it onto the threaded end of the battery.
4. Ensure that the cartridge or atomizer is securely attached to the battery, but be careful not to overtighten it, as it may cause damage.
5. Finally, reattach the mouthpiece or atomizer to the top of the cartridge or atomizer.
Section 2: Charging
Properly charging your Yocan battery is crucial to ensure optimal performance and longevity. Follow these steps to charge your Yocan battery correctly:
1. Connect the USB charger to the charging port on the Yocan battery.
2. Plug the other end of the USB charger into a power source such as a wall adapter or a computer’s USB port.
3. The LED indicator on the battery will light up, indicating that the charging process has started.
4. Allow your Yocan battery to charge fully. The LED indicator will typically turn green or stop flashing when it’s fully charged.
5. Once fully charged, disconnect the USB charger from the battery and the power source.
Note: It’s always recommended to use the provided charger and avoid using third-party chargers, as they may not be compatible or may cause damage to your Yocan battery.
Section 3: Adjusting Settings
Yocan batteries often come with adjustable voltage or temperature settings to customize your vaping experience. Here’s how to adjust the settings on your Yocan battery:
1. Check if your Yocan battery has adjustable settings. Some models have preset voltage or temperature options, while others offer variable settings.
2. If your Yocan battery has preset options, simply press the designated button a specific number of times to cycle through the available settings. Refer to your device’s user manual for the exact button combination.
3. For batteries with variable settings, press and hold the button to enter the adjustment mode. Use the designated buttons or controls to increase or decrease the voltage or temperature according to your preference.
4. Experiment with different settings to find your ideal vaping experience. Remember to start with lower settings and gradually increase if needed.
5. Once you’ve adjusted the settings, press the power button to activate the heating element and begin your vaping session.
Section 4: Troubleshooting Common Issues
Encountering issues with your Yocan battery can be frustrating, but most problems have simple solutions. Here are some common issues and troubleshooting tips:
1. Battery Not Charging:
– Ensure that the USB charger is properly connected to both the battery and the power source.
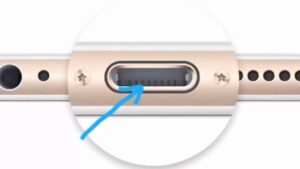
– Clean the charging port on the battery with a cotton swab to remove any debris or residue.
– Try using a different USB cable or power adapter to rule out potential issues with the charger.
2. Weak or No Vapor Production:
– Check if the cartridge or atomizer is firmly attached to the battery.
– Verify that the cartridge or atomizer is properly filled with your preferred vaping material.
– Adjust the voltage or temperature settings to a higher level if available.
– Replace the cartridge or atomizer if it’s clogged or worn out.
3. Battery Not Turning On:
– Make sure the battery is fully charged.
– Click the power button rapidly five times to turn the battery on/off. This feature is designed to prevent accidental activation.
– If the issue persists, check if the battery is locked. Refer to your device’s user manual on how to unlock it.
4. Blinking LED Lights:
– Different blinking patterns indicate various issues. Consult your device’s user manual for specific blinking codes and their meanings.
– In most cases, blinking lights indicate low battery, short circuit, or an atomizer/connection problem. Address the underlying issue accordingly.
Congratulations! You have now learned everything you need to know about using a Yocan battery. We hope this comprehensive guide has provided you with the necessary knowledge and confidence to make the most out of your Yocan vaping experience. Remember to follow the assembly instructions, charge your battery correctly, adjust settings to your preference, and troubleshoot common issues effectively. Enjoy your vaping sessions with your Yocan battery!
Frequently Asked Questions
How do I turn on the Yocan battery?
To turn on the Yocan battery, press the power button located on the device either five times rapidly or three times in quick succession. The LED indicator will blink to indicate that the battery is now turned on and ready to use.
How do I adjust the voltage settings on the Yocan battery?
The Yocan battery allows you to adjust the voltage settings for a personalized vaping experience. To adjust the voltage, press the power button three times in rapid succession. Each click will cycle through the available voltage options. Once you have reached your desired voltage, stop pressing the button, and the Yocan battery will set the chosen voltage.
How do I charge the Yocan battery?
To charge the Yocan battery, connect the charging cable to the USB port on the device and plug the other end into a power source. The LED indicator will light up to show that the battery is charging. Once fully charged, the LED indicator will turn off, indicating that the battery is ready to use.
How long does it take to charge the Yocan battery?
The charging time for the Yocan battery may vary depending on the remaining battery life and the power source used. On average, it takes approximately 1-2 hours to fully charge the battery. It is recommended to avoid overcharging the battery to ensure its longevity.
How do I clean the Yocan battery?
To clean the Yocan battery, use a soft cloth or cotton swab lightly dampened with isopropyl alcohol. Gently wipe the exterior of the battery to remove any dirt or residue. Avoid getting any liquid inside the battery or USB charging port. Ensure the battery is completely dry before use.
Final Thoughts
Using a Yocan battery is a simple and efficient way to enjoy your vaping experience. To start, ensure the battery is fully charged. Next, attach your desired cartridge or atomizer to the battery. Press the power button five times in quick succession to turn on the battery. Adjust the voltage settings to your preference, taking care not to exceed the recommended range for your cartridge. Finally, inhale from the mouthpiece while holding down the power button. With these easy steps, you can effortlessly utilize the Yocan battery for a satisfying vaping session.


