Are you tired of being stranded with a dead car battery? Don’t worry, we’ve got you covered! In this article, we will show you exactly how to use a portable car battery charger to get your vehicle back up and running in no time. No more waiting for roadside assistance or relying on the kindness of strangers. With our simple and easy-to-follow guide, you’ll be able to take matters into your own hands and jump-start your car whenever, wherever. So, if you’ve ever wondered how to use a portable car battery charger, look no further! Let’s dive in and get you back on the road.

How to Use a Portable Car Battery Charger
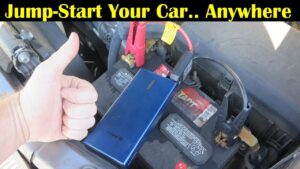
When your car battery loses its charge and you’re stuck with a vehicle that won’t start, a portable car battery charger can be a lifesaver. Rather than waiting for roadside assistance or flagging down a kind stranger, having a portable car battery charger on hand allows you to jump-start your car and get back on the road quickly. In this guide, we’ll walk you through the step-by-step process of using a portable car battery charger effectively.
Step 1: Safety Precautions
Before you begin using a portable car battery charger, it’s important to take some safety precautions to avoid accidents or damage to your vehicle:
- Park your vehicle in a safe and well-ventilated area away from traffic.
- Make sure both the charger and your vehicle are turned off.
- Wear protective gloves and safety glasses to prevent any acid or sparks from harming you.
- Ensure that the charger is compatible with your car’s battery voltage.
- Inspect the battery for any signs of damage or leakage. If you notice any issues, do not attempt to jump-start the car and consult a professional instead.
Step 2: Connecting the Charger
Once you’ve taken the necessary safety precautions, it’s time to connect the portable car battery charger to your vehicle:
- Locate your car’s battery and identify the positive and negative terminals. The positive terminal is usually marked with a “+” symbol, while the negative terminal may be marked with a “-” symbol or colored black.
- Ensure that both the charger and your car’s engine are turned off.
- Attach the red positive cable clamp from the charger onto the positive terminal of your car’s battery.
- Connect the black negative cable clamp from the charger onto a metal part of your car’s engine block. It should be a clean and unpainted surface for a secure connection.
Note: Avoid connecting the negative cable clamp directly to the negative terminal of the dead battery as it may cause sparks.
Step 3: Powering Up
Now it’s time to power up the portable car battery charger:
- Ensure that all cable connections are secure and properly attached.
- Switch on the charger and set it to the appropriate charging mode if applicable. Some chargers have different modes for standard charging, fast charging, or maintenance charging.
- Refer to the charger’s instruction manual to determine the recommended charging time. This may vary based on the charger’s specifications and the condition of your car’s battery.
- Allow the charger to charge your car’s battery for the specified duration. It’s important to be patient during this process and avoid using any electrical devices inside your vehicle.
Step 4: Disconnecting the Charger
Once the charging process is complete, it’s time to disconnect the portable car battery charger:
- Switch off the charger and unplug it from the power source.
- Disconnect the black negative cable clamp from your car’s engine block first.
- Remove the red positive cable clamp from your car’s battery next.
Note: Always disconnect the cables in the reverse order of how you connected them to ensure safety and prevent any sparking.
Step 5: Starting Your Vehicle
With the charger disconnected, it’s time to start your vehicle:
- Turn on your car’s ignition and check if it starts without any issues.
- If your car doesn’t start, repeat the charging process for a longer duration or consider seeking professional help.
- Once your vehicle starts successfully, let the engine run for a few minutes to recharge the battery.
Remember, the portable car battery charger is not meant to permanently fix a faulty battery. It serves as a temporary solution to get your vehicle running again. If you experience frequent battery issues, it’s recommended to have your battery inspected by a professional or consider replacing it.
By following these step-by-step instructions, you can effectively use a portable car battery charger to jump-start your vehicle and get back on the road safely. Always prioritize safety and refer to your charger’s instruction manual for any specific guidelines.
Frequently Asked Questions
How do I connect the portable car battery charger to my vehicle?
To connect the portable car battery charger to your vehicle, follow these steps:
1. Make sure your vehicle is turned off and in park.
2. Identify the positive (+) and negative (-) terminals on your car battery.
3. Attach the red (positive) clamp from the charger to the positive terminal of the battery.
4. Attach the black (negative) clamp from the charger to a metal surface on your vehicle, such as a bolt or bracket, away from the battery.
5. Ensure that the clamps have a secure connection and are not touching each other or any other metal parts.
6. Once connected, plug in the charger to a power outlet and turn it on to start charging your car battery.
How long does it take to charge a car battery with a portable charger?
The charging time for a car battery with a portable charger can vary depending on several factors, such as the charger’s power output, the size of your vehicle’s battery, and the level of charge it currently has. On average, it may take several hours to fully charge a car battery. It’s essential to refer to the charger’s user manual for specific charging time recommendations and safety instructions.
Can I leave the portable car battery charger connected to my vehicle overnight?
It is generally not recommended to leave the portable car battery charger connected to your vehicle overnight or for an extended period without monitoring. Leaving it unattended for too long can overcharge the battery, leading to potential damage. It’s best to follow the manufacturer’s instructions and disconnect the charger once the battery is fully charged or when you no longer need to charge it.
Can I use a portable car battery charger to jump-start my vehicle?
Some portable car battery chargers come with a jump-starting feature that allows you to start your vehicle if the battery is completely dead. However, not all chargers have this functionality, so it’s essential to check the product specifications or user manual to confirm if jump-starting is supported. If your charger supports jump-starting, follow the specific instructions provided by the manufacturer to safely jump-start your vehicle.
Is it safe to use a portable car battery charger in the rain?
No, it is not safe to use a portable car battery charger in the rain or any wet conditions. Water can cause damage to the charger and increase the risk of electric shock. Always ensure you use the charger in a dry and well-ventilated area to prevent any accidents or damage to the charger or your vehicle.
Final Thoughts
Using a portable car battery charger is a simple and efficient way to avoid getting stranded with a dead battery. To begin, ensure that the charger is compatible with your car battery’s voltage and that it is turned off before connecting the cables. Connect the positive (red) cable to the positive terminal of the battery and the negative (black) cable to a metal surface on the engine block. Plug the charger into a power source and turn it on. Once the battery is charged, disconnect the cables in the reverse order. Remember to follow the manufacturer’s instructions for your specific charger model. By mastering how to use a portable car battery charger, you can easily keep your vehicle running smoothly and avoid unnecessary breakdowns.