

Looking for a simple and effective way to test your golf cart battery charger? Well, you’ve come to the right place! In this article, we will walk you through the step-by-step process of how to test your golf cart battery charger to ensure it’s working optimally. Whether you’re a seasoned golfer or just getting started with your golf cart adventures, knowing how to test your battery charger is essential for maintaining the longevity and performance of your golf cart. So let’s dive right in and learn how to test your golf cart battery charger like a pro! Regular maintenance and troubleshooting can save you from unexpected breakdowns and costly repairs, keeping your golf cart ready to roll when you need it. Testing your Club Car charger is a straightforward process that can give you peace of mind, ensuring that your cart’s batteries are charging efficiently and safely. By following a few simple steps, you’ll be able to identify any potential issues and address them right away.

How to Test a Golf Cart Battery Charger
Introduction
Golf carts are a popular mode of transportation on golf courses and in many residential communities. These carts are usually powered by a set of batteries that need to be regularly charged to ensure optimal performance. However, if your golf cart battery charger is not functioning properly, it can lead to issues such as slow charging or even complete failure to charge the batteries. To avoid such problems, it is essential to know how to test your golf cart battery charger to ensure it is in good working condition. In this article, we will guide you through the process of testing your golf cart battery charger effectively.
Why Test Your Golf Cart Battery Charger?
Before we delve into the testing process, let’s briefly discuss why it is important to test your golf cart battery charger. Regularly testing your charger helps in:
- Identifying any underlying issues or malfunctions
- Ensuring efficient charging of the batteries
- Prolonging the battery life
- Preventing unexpected breakdowns
Now, let’s move on to the step-by-step guide on how to test your golf cart battery charger.
Step 1: Safety Precautions
Before starting the testing process, it is crucial to prioritize safety. Follow these precautions:
- Wear appropriate safety gear, such as gloves and safety glasses, to protect yourself from any potential electrical hazards.
- Make sure the golf cart ignition is turned off and the key is removed.
- Disconnect the battery pack from the golf cart to avoid any accidental electric shock.
Step 2: Check for Physical Damage
Inspect your golf cart battery charger for any signs of physical damage. Look for:
- Cracks or dents in the charger casing
- Damaged cables or wires
- Burn marks or melted components
If you notice any physical damage, it is recommended to consult a professional for further inspection or repair.
Step 3: Verify the Input Voltage
To ensure that your golf cart battery charger is compatible with your power source, verify the input voltage requirement. This information is typically found on a label or sticker on the charger. Check that the voltage matches the power supply you are using. If they do not match, you may need to use a different charger or consider using a voltage converter.
Step 4: Inspect the Charging Cable and Connectors
Carefully examine the charging cable and connectors for any signs of wear, corrosion, or loose connections. Clean any corrosion using a wire brush or a suitable electrical contact cleaner. Tighten any loose connectors and ensure they are securely attached to both the charger and the battery pack. Damaged or corroded cables should be replaced to ensure reliable charging.
Step 5: Measure the Output Voltage
To determine if your golf cart battery charger is providing the correct voltage output, you will need a multimeter. Follow these steps:
- Set the multimeter to the DC voltage setting.
- Connect the red probe of the multimeter to the positive terminal of the charger’s output connector.
- Connect the black probe of the multimeter to the negative terminal of the charger’s output connector.
- Power on the charger or connect it to a power source.
- Read and record the voltage displayed on the multimeter.
Compare the measured voltage with the charger’s specified output voltage. If the measured voltage is significantly lower or higher, it indicates a potential issue with the charger.
Step 6: Test the Charger’s Charging Capacity
To ensure your golf cart battery charger can deliver the required charging capacity, you can perform a load test. This test measures the charger’s ability to provide a consistent charge over an extended period. Follow these steps:
- Connect the charger to a fully discharged battery pack.
- Monitor the charging process for several hours.
- Record the charging time taken to reach an appropriate voltage level.
Compare the charging time with the manufacturer’s specifications. If the charger takes significantly longer or fails to reach the recommended voltage, it may not be functioning properly.
Step 7: Consult a Professional
If you encounter any issues during the testing process or if your charger consistently fails the tests, it is advisable to consult a professional. A trained technician will have the expertise to diagnose and repair any faults or recommend a replacement charger if necessary.
Regularly testing your golf cart battery charger is essential for maintaining optimal performance and prolonging the life of your battery pack. By following the step-by-step guide in this article, you can effectively identify any issues with your charger and take appropriate action. Remember to prioritize safety throughout the testing process and consult a professional if you encounter any difficulties.
We hope this comprehensive guide has provided you with the knowledge to confidently test your golf cart battery charger. Keep your golf cart running smoothly and enjoy your next ride on the greens!
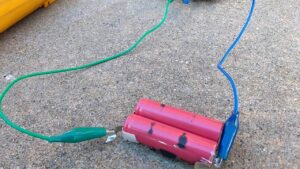
DPI Battery Charger 36 and 48 Volt | Golf Cart Charger Diagnostic
Frequently Asked Questions
How do I test my golf cart battery charger?
To test your golf cart battery charger, follow these steps:
- Start by ensuring that the charger is properly connected to both the power source and the golf cart battery.
- Check if the charger’s indicator lights are functioning as they should. Typically, a solid green light indicates that the charger is connected and charging, while a blinking light may indicate a problem with the connection.
- Use a multimeter to measure the charger’s output voltage. Set the multimeter to the DC voltage setting and connect the positive (+) probe to the positive output terminal on the charger and the negative (-) probe to the negative output terminal.
- Read the voltage displayed on the multimeter. For a 36-volt golf cart battery charger, the voltage should be around 36 volts (±1 volt). For a 48-volt charger, the voltage should read around 48 volts (±1 volt).
- If the voltage reading differs significantly from the expected value, it may indicate a problem with the charger. Consider consulting a professional or referring to the charger’s manual for further troubleshooting steps.
Can I test the charger without a multimeter?
While using a multimeter is the most accurate way to test a golf cart battery charger, you can perform a simple visual inspection to check for any obvious issues. Look for loose or damaged wires, frayed insulation, or burnt components. Additionally, observe the charger’s behavior when connected to the battery. If the charger is not activating or the battery is not charging, it may indicate a problem that requires further investigation.
What should the charger’s voltage output be?
The charger’s voltage output should match the voltage rating of your golf cart battery. Common voltages for golf cart batteries include 36 volts and 48 volts. Typically, the charger should provide a voltage within ±1 volt of the battery’s rated voltage. For example, a 36-volt charger should output around 36 volts, while a 48-volt charger should output around 48 volts.
How often should I test my golf cart battery charger?
It is recommended to test your golf cart battery charger regularly, especially if you notice any issues with the battery’s performance or charging. Performing periodic tests, such as monthly or every few months, can help identify potential problems before they worsen. Regular testing also ensures that the charger is functioning correctly and providing the required voltage to charge your golf cart battery.
What are some common signs of a faulty golf cart battery charger?
Some common signs of a faulty golf cart battery charger include:
- The charger not turning on or activating when connected to the power source.
- No charging indicators or lights appearing on the charger.
- The battery not charging or holding a charge properly.
- Unusual noises or smells coming from the charger during use.
- Visible damage to the charger, such as melted components or frayed wires.
If you notice any of these signs, it is advisable to test the charger and consult a professional if necessary.
Final Thoughts
To test your golf cart battery charger, start by checking the power supply and making sure it is connected properly. Next, use a multimeter to measure the voltage output of the charger. Compare this reading to the manufacturer’s specifications to ensure it is within the acceptable range. Additionally, check the charger for any physical damages or signs of wear. Finally, connect the charger to a battery and observe if it charges the battery effectively. By following these steps, you can easily test your golf cart battery charger and ensure its proper functioning.