

Is your ooze charger acting up? Not to worry, we’ve got you covered! In this article, we’ll guide you on how to fix your ooze charger and get it back to its optimum functionality. Whether you’re a seasoned vaper or new to the game, dealing with a malfunctioning charger can be frustrating. But fear not, because by following a few simple steps, you’ll have your charger working like a charm in no time. So let’s dive in and learn how to fix the ooze charger!

How to Fix an Ooze Charger: A Comprehensive Guide
You’ve just bought a new Ooze Charger for your electronic device, but you’re encountering some issues. Don’t worry – we’re here to help! In this comprehensive guide, we will walk you through the process of fixing your Ooze Charger. Whether it’s a simple troubleshooting step or a more complex repair, we’ve got you covered. So, let’s dive in and get your Ooze Charger working in no time!
1. Check for Basic Issues
Before diving into more complicated solutions, let’s start with some basic checks that might resolve the problem.
1.1. Ensure Proper Connection
The first step is to ensure that your Ooze Charger is properly connected. Check if the charger is securely plugged into the power source and your device. Sometimes, a loose connection can cause charging issues.
1.2. Examine the Charging Cable
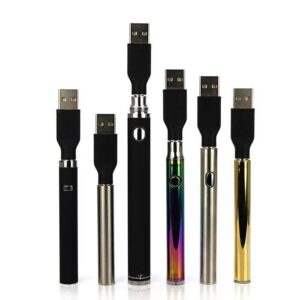
Inspect the charging cable for any signs of wear and tear. Broken wires or bent connectors can lead to charging problems. If you find any damages, consider replacing the cable.
1.3. Clean the Charging Port
Over time, dirt, lint, or debris can accumulate in the charging port, hindering the proper connection. Use a small brush, toothpick, or compressed air to gently clean the port and remove any obstructions.
2. Troubleshooting Common Charging Problems
If the basic checks didn’t resolve the issue, it’s time to troubleshoot common problems that might be affecting your Ooze Charger.
2.1. Check the Power Source
Ensure that the power source you’re using is functioning correctly. Try using a different power outlet or a USB port to charge your device. Faulty power sources can prevent proper charging.
2.2. Restart Your Device
Sometimes, a simple restart can solve charging problems. Turn off your device, unplug the charger, wait for a few seconds, and then plug it in again. Restart your device and check if the charging issue persists.
2.3. Reset Your Ooze Charger
Many Ooze Chargers come with a reset button or a combination of buttons you can press to reset the device. Consult the user manual or the manufacturer’s website to find the specific instructions for resetting your charger. Resetting can often fix charging problems caused by software glitches.
2.4. Use a Different Charging Cable
If you have access to another charging cable compatible with your device, try using it to see if the problem lies with the cable itself. If the new cable works, you’ll know that you need a replacement.
3. Advanced Solutions for Persistent Issues
If you’ve tried the previous steps and are still experiencing charging problems, it’s time to explore more advanced solutions.
3.1. Update Device Software
Outdated software can sometimes interfere with charging functionality. Check for any available software updates for your device and install them. These updates often include bug fixes and improvements that may resolve charging issues.
3.2. Clean the Charging Port Carefully
If cleaning the charging port in the basic checks didn’t work, you might need to be more thorough. Turn off your device, and using a soft, dry toothbrush, gently scrub the charging port to remove any stubborn debris. Be careful not to damage the port or push debris further inside.
3.3. Contact Customer Support
If the previous steps didn’t fix the problem, it’s time to reach out to the manufacturer’s customer support. Check the manufacturer’s website for contact information or submit a support ticket online. They will guide you through additional troubleshooting steps or arrange a repair or replacement if necessary.
4. Preventive Measures for Future Charger Issues
Now that you’ve successfully fixed your Ooze Charger, you’ll want to ensure its longevity. Here are some preventive measures to avoid future charging problems:
4.1. Handle the Charger Gently
Avoid yanking or bending the charging cable excessively, as it can damage the wires or connectors. Handle the charger with care to maintain its integrity.
4.2. Keep the Charging Port Clean
Regularly clean the charging port of your device to prevent debris buildup. Use a soft brush or a can of compressed air to gently remove any dirt or lint. This practice will help maintain a secure connection.
4.3. Avoid Overcharging
Leaving your device connected to the charger for prolonged periods can overheat the battery and potentially damage it. Disconnect your device once it reaches full charge or when you’re not using it for an extended period.
4.4. Invest in Quality Chargers
Using genuine chargers and cables recommended by the device manufacturer can significantly reduce the chances of encountering charging problems. Generic or low-quality chargers may not provide the required power or voltage, leading to issues.
Now that you know how to fix an Ooze Charger and prevent future problems, you’re all set to keep your devices powered up without any hassle. Remember, troubleshooting and fixing charging issues can vary depending on the device and charger model, so always refer to the manufacturer’s instructions for specific guidance. Happy charging!
Fixing a vape pen charging dongle for OOZE or MIG devices
Frequently Asked Questions
How do I fix my Ooze charger if it’s not working?
If your Ooze charger is not working, try the following troubleshooting steps:
What should I do if my Ooze charger is not charging my device?
If your Ooze charger is not charging your device, try the following solutions:
What can I do if my Ooze charger’s LED light isn’t turning on?
If the LED light on your Ooze charger is not turning on, follow these steps to troubleshoot the issue:
Why is my Ooze charger heating up excessively?
If your Ooze charger is heating up excessively, try the following steps to address the problem:
What should I do if my Ooze charger is not making a proper connection to my device?
If your Ooze charger is not making a proper connection to your device, follow these steps to fix the issue:
Final Thoughts
To fix an Ooze charger, start by checking the connections between the charger and the device. Ensure that the charger is properly plugged in and that there are no loose or damaged wires. If the connections are fine, try using a different charging cable or adapter to rule out any issues with those components. Additionally, inspect the charging port on both the charger and the device for any debris or damage. Clean the ports carefully and gently if necessary. If these steps don’t resolve the issue, it may be necessary to contact Ooze support for further assistance with fixing your charger. Remember, troubleshooting and resolving charging problems can be done by following these simple steps for fixing an Ooze charger.
