Looking to keep your vehicle’s battery charged and ready for action? Wondering how to connect a battery tender? Well, you’ve come to the right place! In this article, we’ll walk you through the simple steps of connecting a battery tender, ensuring that your battery stays in top shape and always ready to go. No need to worry about a dead battery when you need to hit the road – just follow our easy guide on how to connect a battery tender and keep your vehicle’s battery juiced up and raring to rev. Let’s get started!

How to Connect a Battery Tender
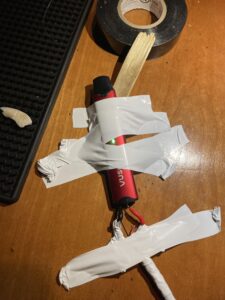
Connecting a battery tender is an essential step in maintaining the health and longevity of your vehicle’s battery. A battery tender, also known as a battery charger or maintainer, is a device that provides a constant low-level charge to the battery when it is not in use. This helps prevent the battery from losing its charge and extends its overall lifespan. In this guide, we will walk you through the process of connecting a battery tender to your vehicle’s battery, ensuring that you do it safely and effectively.
Step 1: Gather the Necessary Tools
Before you begin, it’s important to have all the necessary tools and equipment ready. Here’s what you’ll need:
- Battery tender
- Protective gloves and goggles
- Clean cloth or rag
- Wrench or socket set (if necessary)
Step 2: Prepare the Battery Tender
Before connecting the battery tender to your vehicle, make sure it is prepared and ready to use. Follow these steps:
- Read the user manual: Each battery tender may have specific instructions, so it’s essential to familiarize yourself with the manufacturer’s guidelines.
- Inspect the cables: Check the condition of the cables for any signs of damage or wear. If you notice any issues, avoid using the battery tender and consider replacing the cables.
- Connect the cables: Many battery tenders have two cables, typically colored red and black. The red cable is positive (+), and the black cable is negative (-). Ensure the cables are not twisted or crossed.
- Verify the voltage: Make sure the battery tender is set to the correct voltage for your vehicle’s battery. Most automotive batteries operate at 12 volts, but it’s essential to confirm to avoid any damage.
Step 3: Prepare Your Vehicle
Now that your battery tender is ready, it’s time to prepare your vehicle for the connection process:
- Turn off the vehicle: Ensure that your vehicle’s engine, lights, and any other electrical components are turned off before connecting the battery tender. This prevents accidental electrical shocks or surges.
- Open the hood/trunk: Locate the battery in your vehicle. In most cases, you’ll find it under the hood or in the trunk. Once located, open the hood or trunk to gain access to the battery.
- Clean the battery terminals: Inspect the battery terminals for any corrosion or debris. If you notice any build-up, use a clean cloth or rag to gently remove it. This allows for better electrical contact.
Step 4: Connect the Battery Tender
Now it’s time to connect the battery tender to your vehicle’s battery:
- Identify the battery terminals: The battery terminals are typically marked as (+) for positive and (-) for negative. Familiarize yourself with these signs before proceeding.
- Connect the positive cable: Attach the red cable from the battery tender to the positive terminal of the battery. Ensure a secure connection by tightening any necessary bolts or clamps.
- Connect the negative cable: Attach the black cable from the battery tender to the negative terminal of the battery. Again, make sure it is securely fastened.
Step 5: Complete the Connection
After connecting the battery tender, it’s important to double-check everything before moving forward:
- Inspect the connections: Ensure that both the positive and negative cables are securely attached to the battery terminals. A loose connection can lead to inefficiencies or potential hazards.
- Verify the polarity: Confirm that the red cable is connected to the positive terminal and the black cable to the negative terminal. Reversing the polarity can cause damage.
Once you’ve completed these steps, you can power on your battery tender and let it do its job. It will provide a constant low-level charge to your vehicle’s battery, keeping it fully charged and ready for use when needed.
Tips and Precautions
Here are some additional tips and precautions to keep in mind when connecting a battery tender:
- Read the manual: Always refer to the manufacturer’s instructions and guidelines specific to your battery tender.
- Follow safety measures: Wear protective gloves and goggles to prevent any potential accidents or injuries.
- Keep the area ventilated: Ensure that you are connecting the battery tender in a well-ventilated area to avoid the buildup of gases emitted during charging.
- Regularly inspect the battery: Check the battery and connections periodically for any signs of damage or corrosion. Address any issues promptly.
By following these steps and precautions, you can easily connect a battery tender to your vehicle’s battery and ensure its longevity and optimal performance. Remember, proper battery maintenance is key to maximizing the lifespan of your battery and minimizing the risk of unexpected breakdowns.
Frequently Asked Questions
How do I connect a battery tender to my vehicle?
To connect a battery tender to your vehicle, follow these steps:
What tools do I need to connect a battery tender?
The tools you will need to connect a battery tender are:
Can I connect the battery tender directly to the battery?
Yes, you can connect the battery tender directly to the battery. However, it is recommended to connect it to the battery terminals for easier access.
What is the correct order to connect the battery tender?
The correct order to connect the battery tender is as follows:
What precautions should I take when connecting a battery tender?
When connecting a battery tender, it is important to take the following precautions:
How long does it take to fully charge a battery using a battery tender?
The time it takes to fully charge a battery using a battery tender can vary depending on the battery’s capacity and its current state of charge. It is recommended to refer to the battery tender’s manual for specific charging times.
Final Thoughts
To connect a battery tender, start by preparing your battery. Ensure it is clean and free of any corrosion. Next, locate the positive and negative terminals on the battery. Then, attach the positive red clip from the battery tender’s connector to the positive terminal and the negative black clip to the negative terminal. Once connected, plug in the battery tender to a power outlet. The battery tender will automatically monitor and maintain your battery’s charge. Regularly check your battery tender for any signs of damage or wear to ensure safe and efficient charging. With these simple steps, you can easily connect a battery tender and keep your battery in optimal condition.